
Introduction
Handling communication across Google Sheets and WhatsApp can be tedious when done manually. Often, it requires copying messages from a spreadsheet and sending each one individually on WhatsApp—a repetitive task prone to error, especially when speed and accuracy are critical. The SheetWA Chrome extension offers a simple, efficient solution by integrating directly with Google Sheets, enabling users to send WhatsApp messages to multiple contacts right from the sheet.
This tool saves time and effort, letting you focus on what matters most. In this article, we’ll explore how SheetWA can streamline your messaging and guide you through its easy setup.
Why Use SheetWA?

SheetWA provides essential benefits for users who frequently communicate via WhatsApp. Here’s why it’s a valuable tool:
1. Save Time and Effort

Sending messages manually from Google Sheets to WhatsApp can be laborious, particularly when dealing with numerous contacts. With SheetWA, you can automate this process, sending messages directly from your spreadsheet.
This feature saves time and minimizes the possibility of errors, allowing users to handle hundreds of messages in a few clicks. Automation with SheetWA frees up time to focus on other valuable tasks, making it a top choice for professionals and organizations.
2. Increase Efficiency

Beyond saving time, SheetWA enhances messaging accuracy by reducing manual input, which often leads to mistakes. When messages are sent individually, errors can slip through, from selecting the wrong contact to sending incomplete data. By automating each step, SheetWA ensures consistency and accuracy, with no room for human error. Using data directly from Google Sheets, SheetWA minimizes the need for repeated inputs, making it possible to manage large-scale messaging with confidence and accuracy.
3. Seamless Integration

SheetWA’s ability to integrate directly with Google Sheets is one of its greatest strengths. This allows users to operate within a familiar interface without additional software or technical expertise. For those accustomed to using Google Sheets, this integration reduces the learning curve and setup time. Additionally, SheetWA bypasses the complexities of API setups, offering an intuitive, accessible solution. This makes it practical and user-friendly for anyone looking to simplify their WhatsApp communication and automate repetitive tasks effectively.
Setting Up SheetWA: Step-by-Step Guide
To start using SheetWA with Google Sheets, follow these steps:
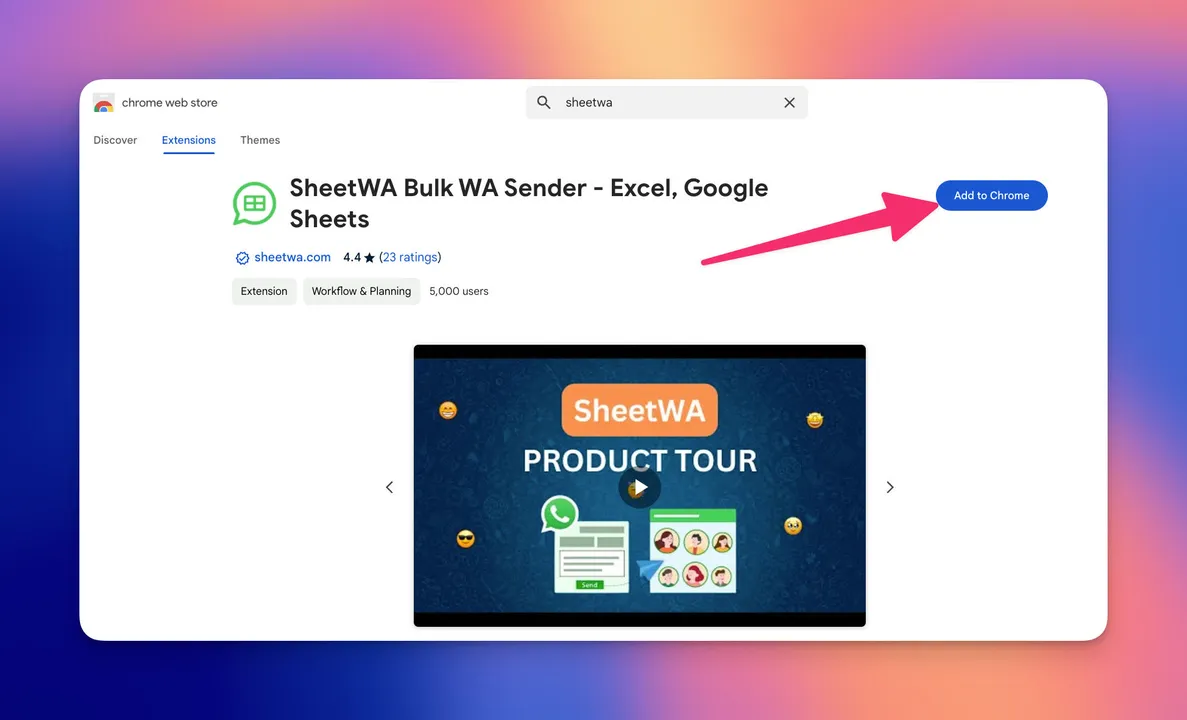
Step 1: Install the Extension
Begin by visiting the Chrome Web Store and searching for "SheetWA." Click "Add to Chrome" to install the extension. Once added, you’ll see SheetWA in your Chrome toolbar, ready to configure.
Step 2: Grant Permissions
After installation, SheetWA will prompt you to grant access to Google Sheets and WhatsApp. These permissions enable the extension to access data and automate message sending. Approve the permissions to proceed.
Step 3: Login Using Google Authentication
Click on the SheetWA icon in your toolbar, and sign in using Google authentication. This allows SheetWA to securely access your Google Sheets data and prepares it for integration with WhatsApp Web.
Step 4: Configure WhatsApp Web
Lastly, open WhatsApp Web in your browser and scan the QR code displayed using the WhatsApp app on your phone. This action connects SheetWA to your WhatsApp account, allowing it to send messages through the platform.
How to Send WhatsApp Messages from Google Sheets Using SheetWA
Once you’ve set up SheetWA, sending WhatsApp messages becomes a smooth process. Here’s how to do it:
Step 1: Prepare Your Spreadsheet
Organize your Google Sheets document to include essential data fields like “Name,” “Message,” and “Phone Number.” This setup allows you to send personalized messages efficiently.
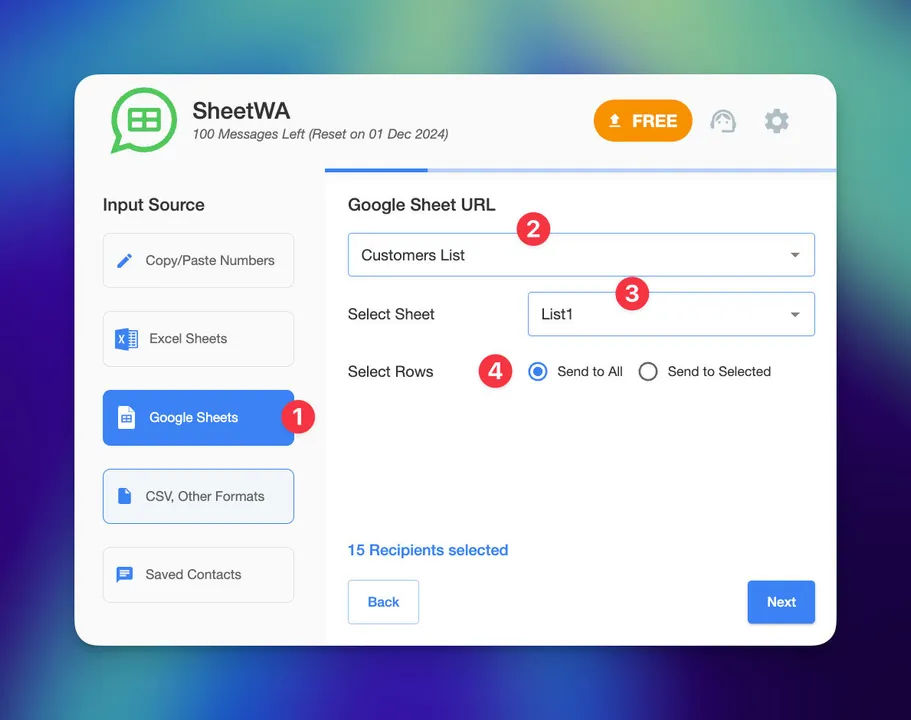
Step 2: Select Recipients
Decide which contacts or groups you’d like to message. SheetWA lets you choose specific contacts or entire groups and allows easy country code adjustments for accurate delivery.
Step 3: Customize Your Messages
Use placeholders in your message, such as {Name}, to automatically personalize each message.
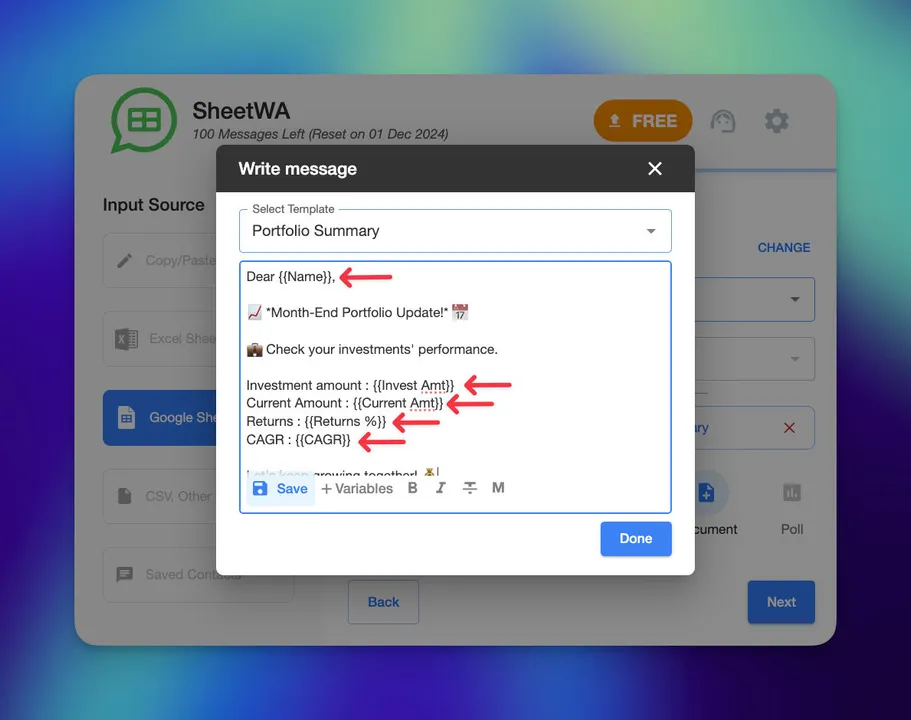
This approach helps build engagement by adding a personal touch, which makes your messages feel individualized.
Step 4: Start Message Sending
Open SheetWA, select "Send Message Now," and paste the Google Sheets URL. Map the fields accordingly, add any attachments if needed, and click "Send." SheetWA will automate the rest, completing your messaging task.
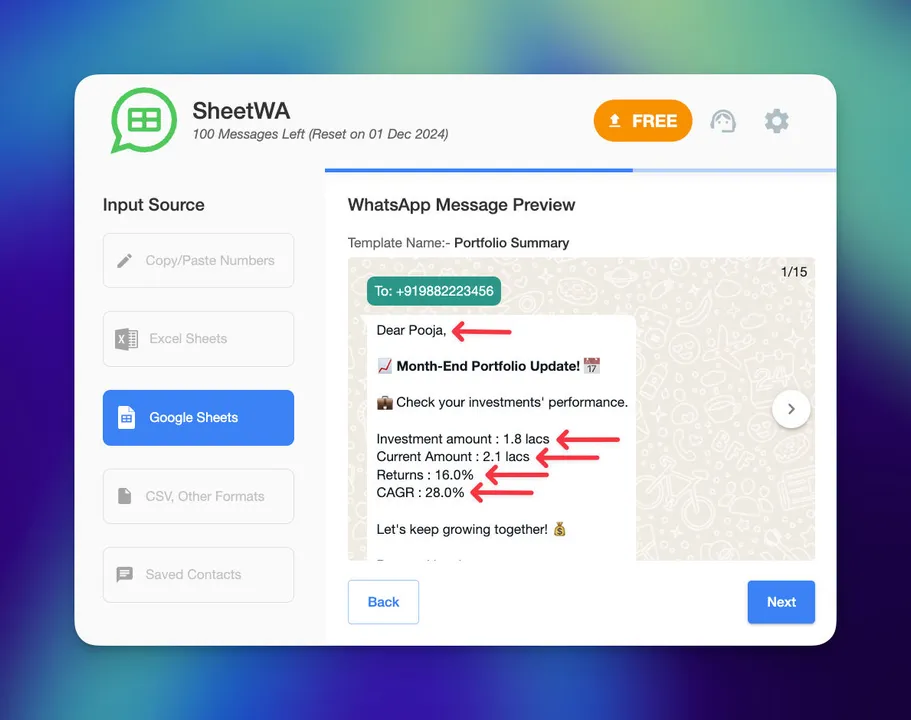
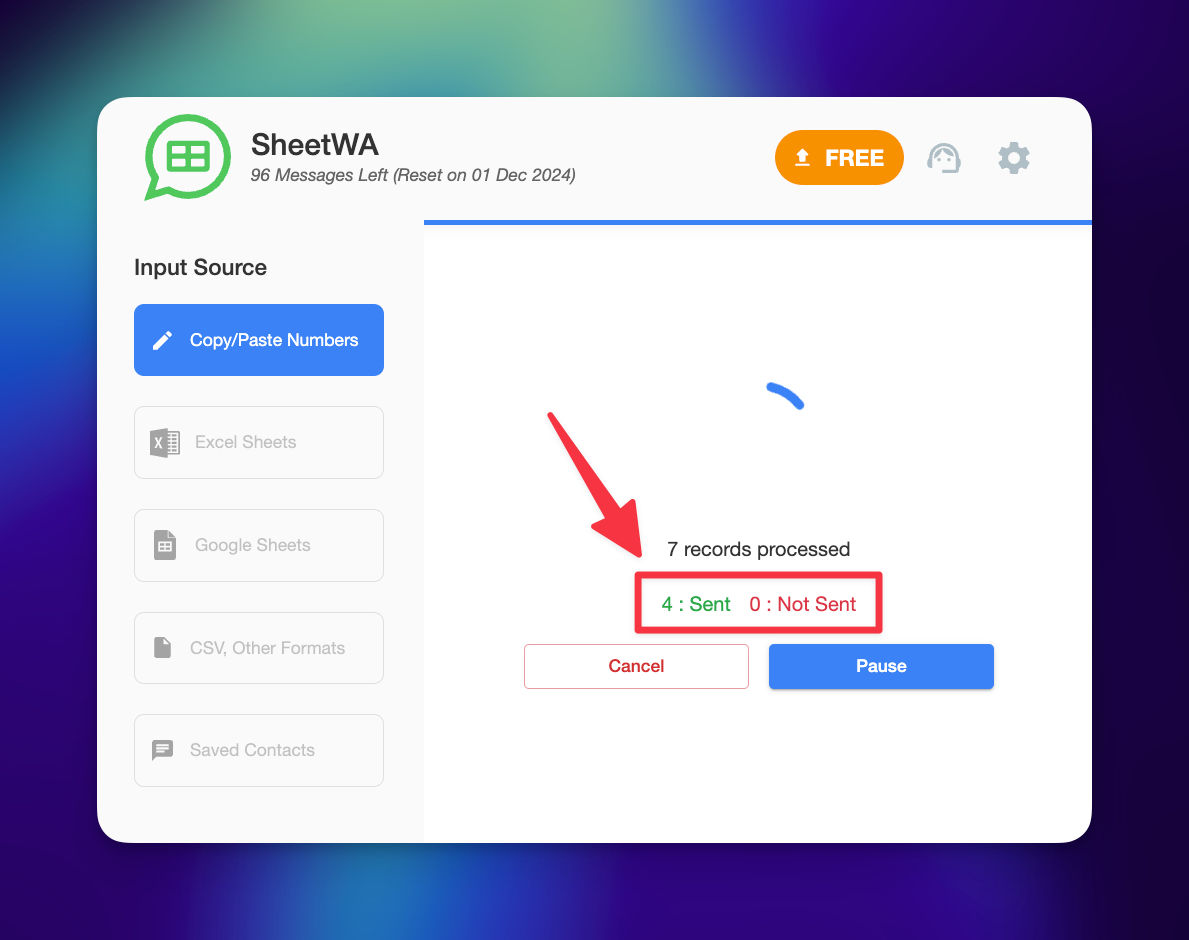
Step 5: Monitor Sending Progress
SheetWA provides real-time monitoring, showing the status of each message. This allows you to track deliveries and identify any errors, ensuring your messages reach their intended recipients.
Tips and Tricks for Using SheetWA
Enhance your experience with these tips:
Send in Batches

To avoid overwhelming WhatsApp servers and potential flagging, send messages in smaller groups. This creates a natural delivery pattern and ensures smooth message delivery.
Track Responses

Since SheetWA does not track responses, you’ll need to manage replies within WhatsApp directly. Label or categorize messages for easy tracking if necessary.
Regularly Update SheetWA

Periodically check for updates on the Chrome Web Store to ensure you’re using the latest version of SheetWA. Updates often bring new features and bug fixes, enhancing functionality.
Conclusion
SheetWA is an ideal solution for sending WhatsApp messages directly from Google Sheets. With seamless integration, automation, and a user-friendly setup, it’s perfect for individuals and businesses looking to streamline their messaging workflows.
Try SheetWA today and experience efficient communication directly from Google Sheets!